DCAudioDIY.com http://www.dcaudiodiy.com/phpBB3/ |
|
Guy's Turntable http://www.dcaudiodiy.com/phpBB3/viewtopic.php?f=4&t=90 |
Page 1 of 2 |
Author: | Guy [ August 1st, 2013, 9:52 am ] |
Post subject: | Guy's Turntable |
Well, I see that I did not bring over my project description from the Facebook page so I'd better start putting it in here. Please consider this note as a spaceholder for the article. In general, I hoped to save money in the long run by buying a platter-and-bearing set and a linear air-bearing tonearm and putting together a turntable with performance representing a product that cost much more. I don't know if I achieved that, and I should put a better cartridge in it to find out! However, I'll add my long, drawn-out story hear in time. ![]() |
Author: | Guy [ August 1st, 2013, 10:10 am ] |
Post subject: | Re: Guy's Turntable |
Introduction As a member of a DIY club, I was inspired by other members’ projects to present my own project. Other club members had built turntables, and I thought I’d try. However, I didn’t have access to a machine shop, so I had to find other ways to get crucial parts, namely a bearing-and-platter assembly and a respectable tonearm. Internet searches turned up a manufacturer that provided platter-and-bearing kits, and another manufacture that produced nice-looking tangent-tracking tonearms. This article describes how I built a wooden plinth, a motor enclosure, and an air-supply system to combine those two subassemblies into a turntable that performs better than a commercial turntable that costs the same as my investment in the project. Attachment:
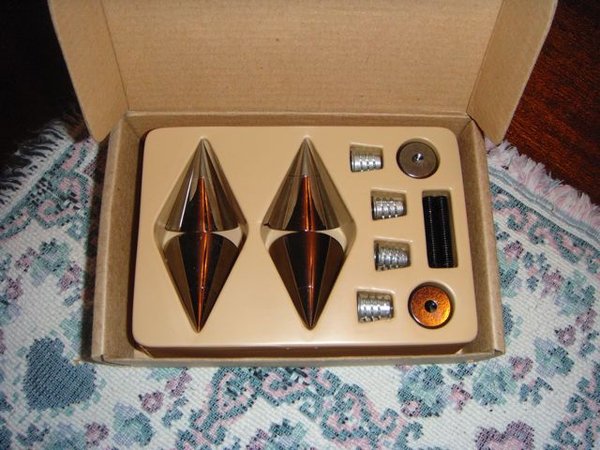
File comment: Figure 1: The Finished Turntable with Outboard Motor Pod At The Show.jpg [ 169.59 KiB | Viewed 40788 times ] Platter An Internet search yielded a company called Choir Audio (http://www.choiraudio.com) in Georgia. John Parker at Choir Audio designs and markets his own turntables. As part of his custom manufacturing service, he offers a platter and bearing kit called the CAK 1.1 Audiophile Turntable kit (see Figure 2). This consists of a high-carbon-steel bearing assembly with ceramic ball bearing, Delrin thrust plate, and stainless-steel main spindle topped off with a 1”-thick platter made of 6061 aluminum billet. I exchanged e-mails with John, who freely offered advice and opinions that help make my project a success: for example, we discussed other platter materials (such as Delrin), drive systems, grounding, platter mats, etc. By the way, this platter was designed to use a mat – do not run it without one! The kit cost $685 including shipping. John believes that strength, weight, and rigidity are important to turntable building, and this was reflected in the fact that his bearing required a 1¼“ mounting hole, top-plate thickness between 1¼“ and 1¾“, and 3” of clearance below the upper mounting surface for clearance. This was incorporated in the plinth design. Attachment:
File comment: Figure 2: The CAK 1.1 Audiophile Turntable Kit CAK 1.1.jpg [ 71.55 KiB | Viewed 40788 times ] Tonearm I could have bought a new or used commercial tonearm, but I’ve always been intrigued by tangent-tracking arrangements. Another Internet search revealed Ada Lin’s web page (Advanced Analog Audio Lab, http://www.adanalog.com), which offers an air-bearing, tangent-tracking tonearm that he makes and sells for $659 including shipping (see Figure 3). It had a low-mass slide-arm tube weighing only 25 grams without cartridge and counter weight, and a core-arm tube of carbon fiber bonded to precision-machined 7075 aluminum. It was leveled by three pointed setscrews, and had 1.4” of vertical tracking angle (VTA) adjustment monitored by a digital readout. The air-bearing portion required a low-pressure air source (minimum 2 psi at 15 liters per minute), which added another level to the project, and is covered in the construction description. Attachment:
File comment: Figure 3: The MG-1 Tonearm by Advanced Analog Audio Lab MG-1 Tonearm.png [ 440.16 KiB | Viewed 40788 times ] Copyright 2012 Guy W. Riffle. All rights reserved. |
Author: | Guy [ August 1st, 2013, 10:20 am ] |
Post subject: | Re: Guy's Turntable |
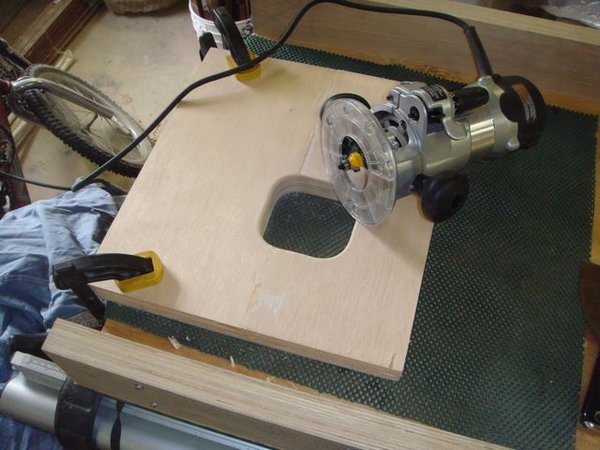
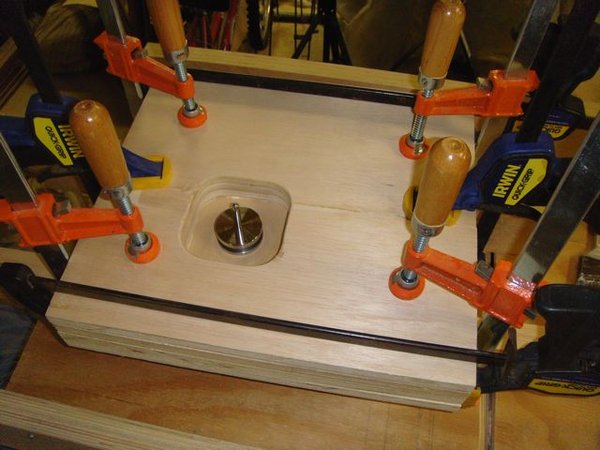
Plinth, Part 1 Many questions arose when I tried to start building the turntable: how big should the plinth be? What materials should I use to make the plinth? Should the plinth incorporate a suspension system? Should the platter-drive motor be mounted on the plinth or on a separate box? What the heck is a plinth? Starting with the last question, John Parker said, “A plinth is the enclosure or stand used to support your platter and bearing assembly. This will be the foundation of your design. Please remember that the plinth design will need to be executed in such a way as to offer complete stability. Stability can be achieved through a build that offers both weight and precise construction. If the plinth is not stable and level, the entire project will suffer.” After struggling to choose a direction, I realized I had to start somewhere that might not have the optimal solutio, but would give me a starting point for future comparisons. I decided to make the plinth out of layers of birch-veneered plywood. A suspension system was too complicated to consider, so I skipped it and hoped that I could isolate the turntable in other ways. The platter was designed for belt drive around its perimeter, and John Parker said, “If you mount the motor and drive pulley very close to the platter, then you will need to consider the reduced wrap angle of the belting material and the reduced surface area that can be used to retain tension on the belting material. This could cause very irregular speed control because of slippage.” For this reason, the motor was mounted in its own box separate from the plinth. How did I answer the question of how big to make the plinth? Well, it should probably be bigger than the platter and tonearm, but not so much that I couln’t fit it on a shelf. An interesting source online at http://www.vinylengine.com/tonearm_database.php described mounting requirements for many commercial arms, and I started to find a plinth size that would support as many arms as possible. Then I realized that I probably wouldn’t change the tonearm anyway, so I just made the plinth big enough for the Lin tonearm. In the end, I made the plinth 16” wide and 14½” deep, as shown in Figure 6. These dimensions increased by 1½“ when the plywood plinth was wrapped with ¾“ oak. I chose birch-veneer plywood because it was available, had more plies and less voids than regular plywood, and provided a finished surface when assembled. Voids could cause resonant cavities in the plinth, and should be avoided (so to speak). By using a 2’ x 4’ sheet of plywood, I could get all my pieces with at least one manufactured edge to allow square trimming later, as long as I didn’t mind joining two pieces to make the bottom layer. See Figure 4 for a cutting plan. Figure 5 shows the five pieces of plywood cut to size. The two narrow pieces were slotted for gluing biscuits and glued together, giving me four equal-size pieces. The fourth biscuit was missing because the section of seam it would occupy was cut out to provide access to the bearing’s torque nut. I drilled the two top pieces to receive the bearing, which was designed for a 1½“ plate. I put blue painters’ tape on the wood and marked my layout lines on the tape so I wouldn’t have to sand off the layout lines later, and the tape reduced splintering when sawing and drilling. Before drilling the bearing hole, you should lay out the tonearm mounting holes that key off the center of the platter. The tonearm came with laminated templates that are harder to use once you replace the bearing center point with a big hole! I had to go back and cover the bearing hole with painters’ tape, locate the center again, and then locate the tonearm mounting holes. Attachment:
File comment: Figure 4: Cutting Sheet for Plinth using 2’ x 4’ Sheet of Plywood Cutting Sheet for Plinth.png [ 47.53 KiB | Viewed 40787 times ] Attachment:
File comment: Figure 5: Plywood Pieces that Make Up the Plinth Plywood Pieces for the Plinth.jpg [ 35.08 KiB | Viewed 40787 times ] Attachment:
File comment: Figure 6: Dimensions of Plinth Top Plate Dimensions of Plinth Top Plate.png [ 202.94 KiB | Viewed 40787 times ] I laid out the two top pieces carefully using the factory edges for reference and marked the bearing hole 5¾” from the back and 6¼“ from the left as laid out in Figure 6. I drilled the two holes separately on a drill press because it’s easier to drill thinner pieces then thicker – the bits get very hot when you drill thick stuff. I used a 1¼” hole saw because I didn’t have a Forstner bit that big, and, in my experience, a spade bit usually makes a horribly rough hole – good for rough carpentry but not for cabinetwork. Copyright 2012 Guy W. Riffle. All rights reserved. |
Author: | Guy [ August 1st, 2013, 11:11 am ] |
Post subject: | Re: Guy's Turntable |
Air Supply The Ada-Lin MG-1 tonearm needed a constant supply of low-pressure air to support its air bearing. Mr. Lin offered the Alita AL-15A linear air pump on his web site, and I’m not experienced with air-bearing arms but it appeared that no additional valving or controls were required. I thought I could get an air pump for less cost that listed on Mr. Lin’s site. I considered something from the HiBlow family, but stuck with the tonearm-manufacturer’s recommendation. I bought an Alita AL-15A online (http://www.PondMerchant.com) for $115. Online forums warned about air-pump pulses and moisture in airlines. To counter this, I built a surge tube with an air drier. The surge tube was made of PVC (see Figure 18). I bought a 4” closed PVC toilet flange, a PVC pipe cap, and a 5’ length of PVC (the shortest I could buy). I drilled two 9/16” holes, one in the top and one in the bottom, and tapped both for 3/8”-18 NPT. I loosely packed the length of PVC with Dacron pillow stuffing from a crafts store, and glued the three pieces together with PVC glue. I roughed up the outside, sprayed it with PVC primer, and finished it with a few coats of white paint. It was a little unstable, so I attached it to a wooden cutting board with lag screws. A pair of ¼“ tube fittings were screwed into the threaded holes so ¼“ tubing could be attached. Attachment:
File comment: Figure 18: Surge Tube with Dryer Surge Tube with Dryer.jpg [ 136.42 KiB | Viewed 40777 times ] At the suggestion of a friend in the club, I bought a laboratory-quality air drier from http://www.drierite.com and added it to the side of the surge tube (see Figure 19). I got the gas-drying unit (with hose barbs, #26800), a mounting clip (#26809), and a 1-lb. jar of 8-mesh desiccant (#23001). I drilled two holes in the side of the surge tube and tapped them for 10-32. I then dabbed black RTV on the holes and screwed the mounting clip to the surge tube with 10-32 binding-head screws. When the desiccant absorbs water vapor, it turns pink (look again at the bottom of the drier in Figure 18); it’s ready to change when it’s all pink. The cool thing is that I could rejuvenate the desiccant by heating it in the oven; then I could use it again! I went overkill on the air treatment, as can be seen in Figure 18: I added a water separator on the right side of the surge tube in addition to the air drier. This part added no benefit to the project and was not needed. Attachment:
File comment: Figure 19: Air Drier Mounted on Surge Tube Air Drier Mounted on Surge Tube.jpg [ 105.32 KiB | Viewed 40777 times ] The tubing started at the air pump and connected to the bottom of the drier. A second piece of tubing connected from the top of the drier to the bottom of the surge tank. The last piece of tubing connected from the top of the surge tank to the tonearm. I may find that the air pump is too loud to keep in the room while listening. In that case, I’ll move it to the next room and use a long piece of air hose and a remote switch to control the air supply. My surge tube was pretty tall – I thought I’d use all the tube I bought. A 3’ tube may be sufficient, or you could make two 3’ tubes and connect them with a piece of hose. The result would fit better into normal room décor, maybe behind the stereo stand. Other on-line suggestions for a surge tank included a one-gallon or five-gallon plastic gasoline jug filled loosely with stuffing as a surge tank and fitted with hose fittings. |
Author: | TubeDriver [ August 1st, 2013, 11:31 am ] |
Post subject: | Re: Guy's Turntable |
![]() |
Page 1 of 2 | All times are UTC - 5 hours [ DST ] |
Powered by phpBB® Forum Software © phpBB Group https://www.phpbb.com/ |